
The Handbuilding Bible
Element 115's Handbuilding Bible
Episode one: The curse of the banking wobble
Im sure everybody has encountered this issue before, some of you may already know how to deal with it but for those who do not here is a rundown on the problem and its solution.
Our situation
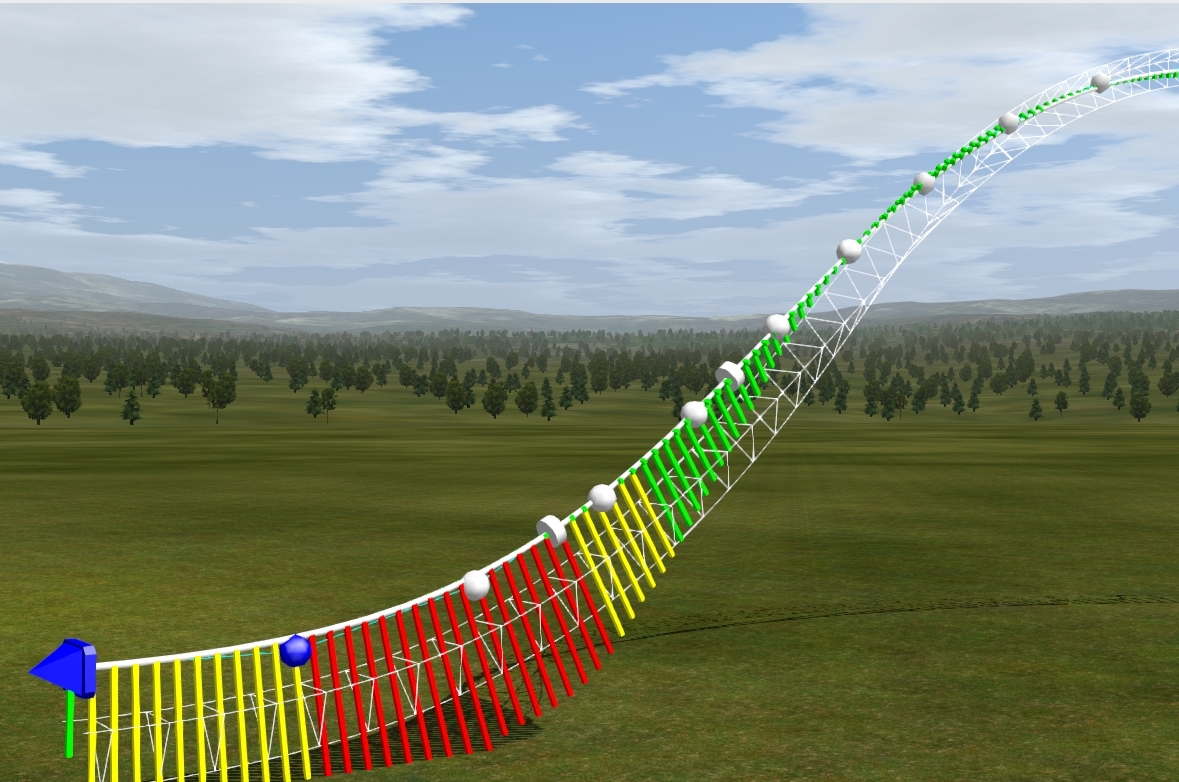
As you can see below we have an overbanked turn into a shallow dive, followed by a pullout. From an off ride perspective it looks perfectly fine.
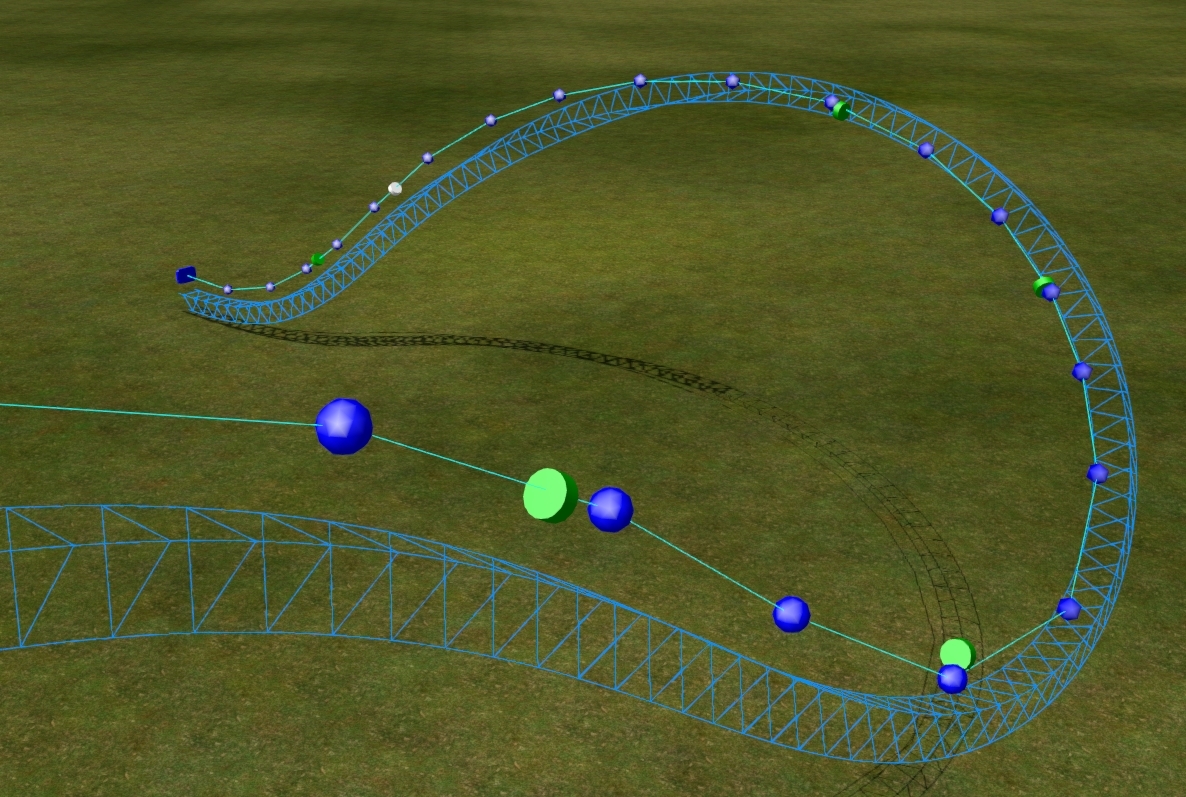

As you can see, on the exit of the drop i have positioned two nodes, these nodes are set to zero degrees banking to flatten out the track before the next element. By riding the coaster in editor track view, we can notice the wobble immediately.

What causes it?
Nolimits 2 uses continuous rolling in its banking, therefore there is often some overcompensation when banking to zero with a fairly high roll rate. Now i could just set the first roll node to strict 0 degrees and delete the second one entirely, this would eliminate the wobble but bring in a whole new issue. Your lovely transition now rides like a knock off Pinfari, if you happen to be creating an actual knock off Pinfari then you can leave now and i wish you good luck, but for those of us who are not lets continue.
Eliminating the wobble
Lets start by looking at our transition from the top view with the view mode set to "Spline" from the drop down box.

By following the lower spine of the track, we can see that it it crosses over the yellow coaster spline once, then returns to the centre and continues. This is the source of our wobble.
To fix the wobble we will bank the roll node before the final roll node by one degree at a time, until the spine of the wireframe track aligns perfectly with the yellow coaster spline and does not cross over it, the process is shown below.

You can check the wobble has been removed by re riding your coaster in track view.

As you can see, there is now no wobble at all and the transition flows smoothly to flat track, you are on your way to a lovely flowing layout free of strict banking and overcompensating rolls.
I know most people here already know how to stop this issue, this is meant more for people fairly new to No Limits 2 that have encountered this problem. I will move on to more advanced stuff in future posts.
Element 115's Handbuilding Bible
Episode two: Start simple, add complexity
In this episode, i will cover the process of creating an element within your layout, and the steps i then take to perform the initial smoothing and create the "first draft" of the element, we will be covering the initial rough draft, the methods used to smooth it out, as well as some tips for using the depumping tool more effectively.
The rough draft
For this step lets use our original overbanked element from the previous episode. To create this i simply drew out the general shape i wanted by using the top and side views, as well as the perspective view for some parts. I depumped the whole thing and added some roll nodes to get the general roll and banking i desired.
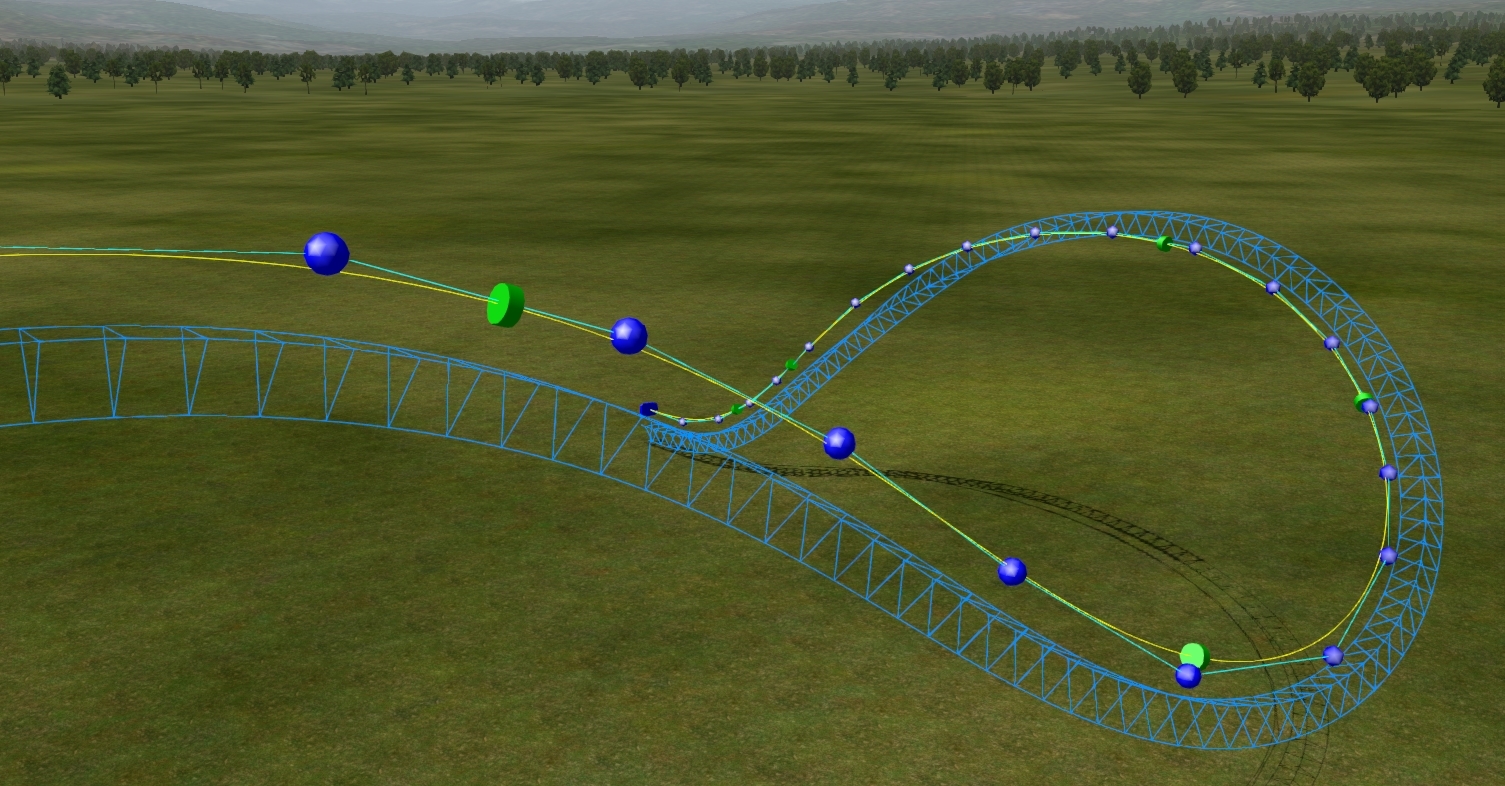
For this draft feel free to tinker with the vertice positions and roll rates as you wish. The depumper is your best friend as a hand-builder, however it is not perfect, try to avoid using the depumper in this step as due to the low vertex density, the shape can be dramatically altered between each pass, more on that later.
Once you have ridden your draft in track view, and are happy with the general shape and the rolling is nice and fluid with no wobble, we are ready to move on to the next step of the process. Do not worry if your element is rough and pumpy at this point, we DO NOT care about the smoothness yet, that's what happens within the next and longest step of this episode.
Increasing the vertex density
So remember what i mentioned earlier about the depumper causing a loss of shaping? This is where this step comes in, by increasing the amount of vertices within your element, you can depump it multiple times with minimal loss of shape, this process is done using the insert vertex tool.
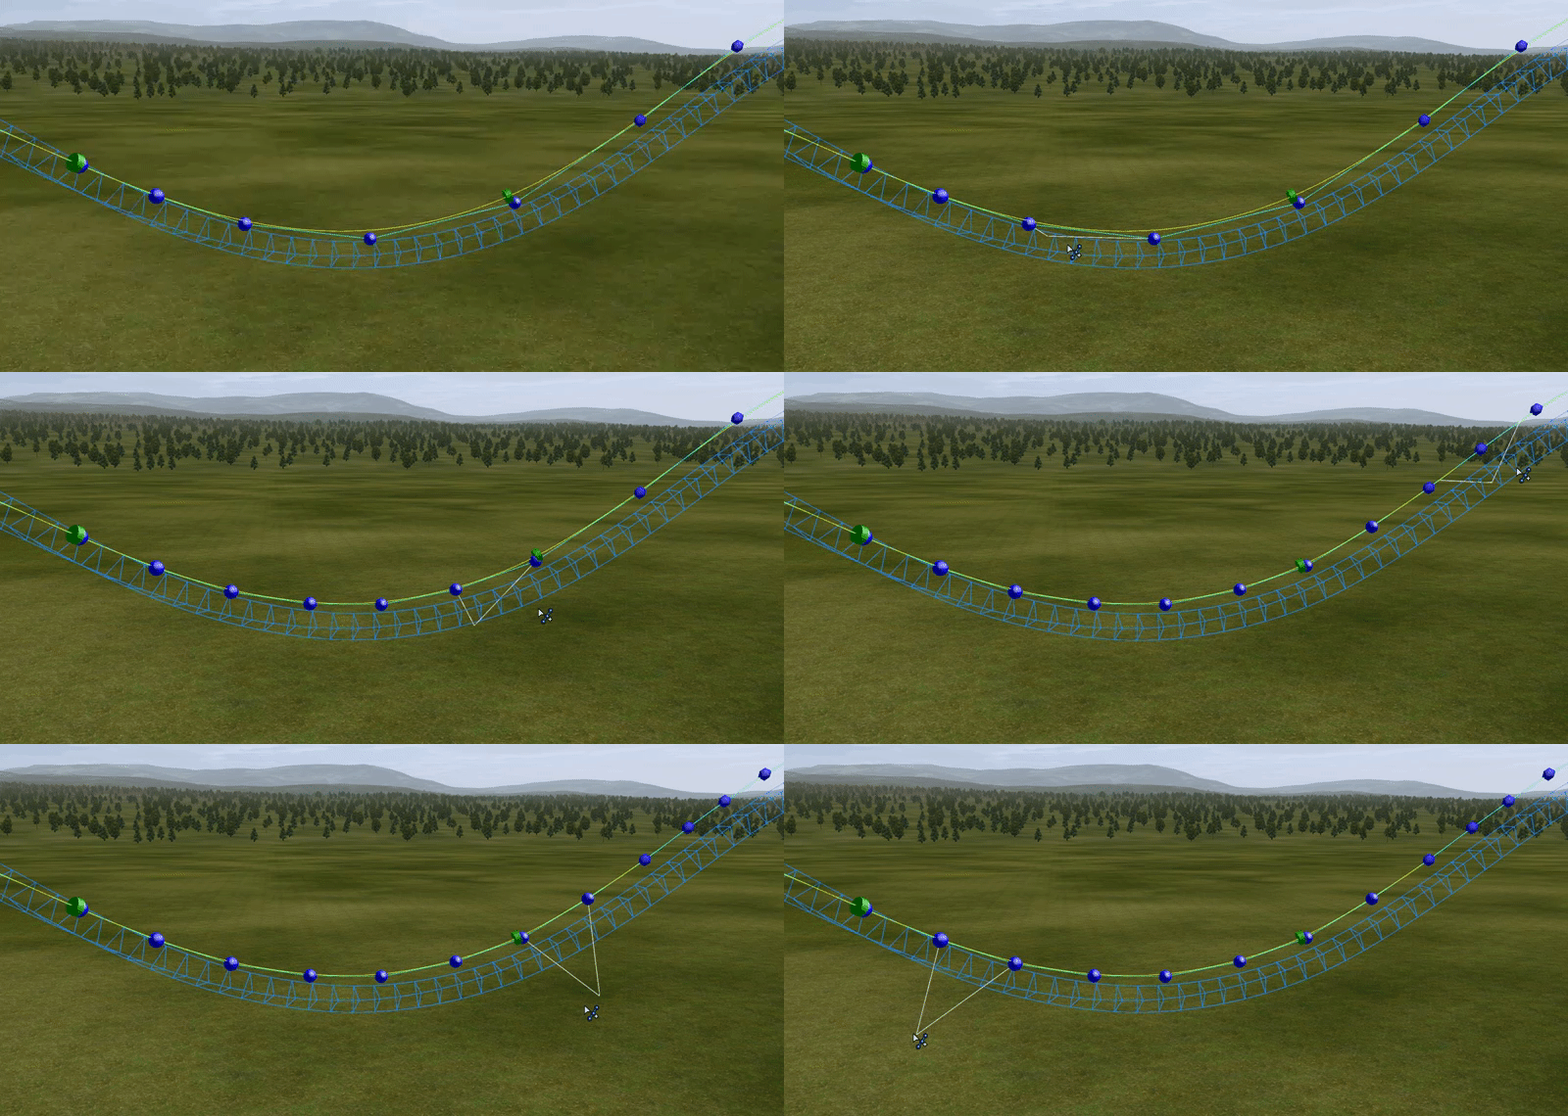
Look for the largest gaps between your vertices and insert just one vertex in each, pass along the entire element doing this on every large gap, then depump at least twice. If your vertex density is very low on your draft, you may have to manually move the inserted vertices before your first depump. Once this has been completed, check your radius comb within the editor to see how smooth your track spline is, if you are not happy, repeat the process as many times as you want and further increase the density. Remember to depump multiple times after each pass.
Once this is done be sure to go back and check your roll, ride the track within the editor and re adjust your roll nodes as they may have shifted as you inserted the vertices. Ensure that your roll flows smoothly from point to point, DO NOT WORRY ABOUT LATERAL FORCES, obviously make sure they are not completely ridiculous but prioritise the banking and roll flow over the forces during this step, they can be eliminated later on, through a process i will cover in a future episode.
Finding the balance
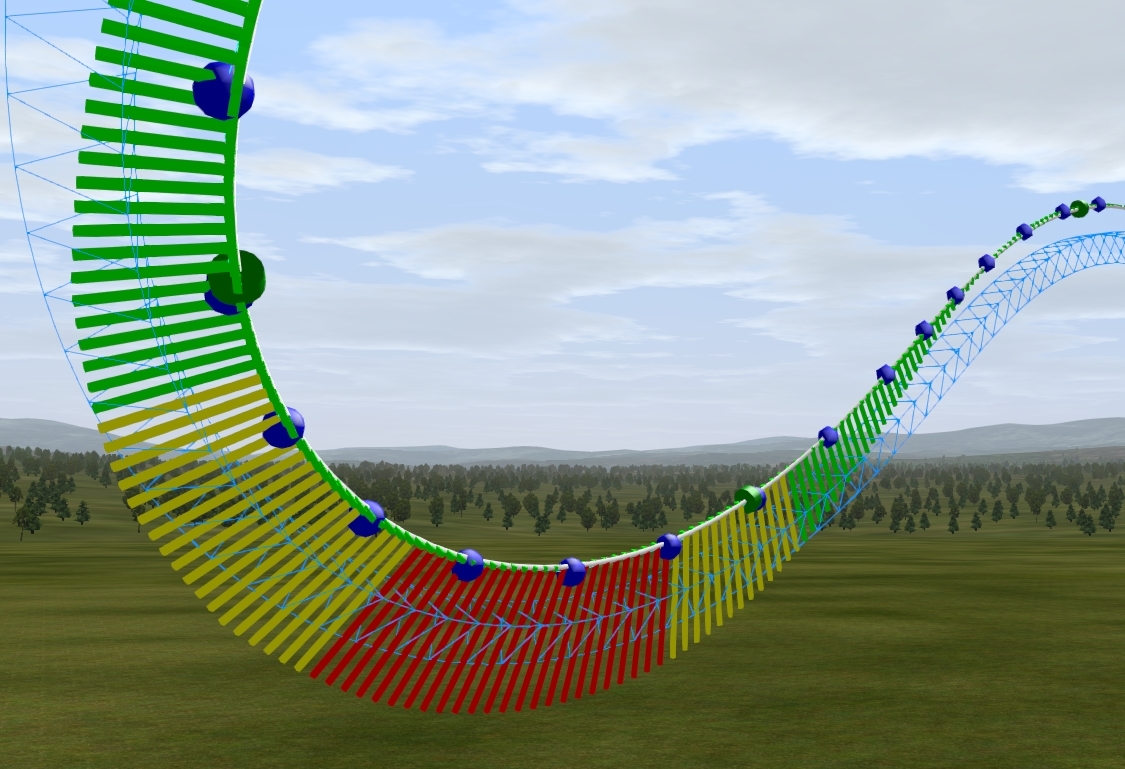
So as we have discussed so far, increasing the vertex density allows for easy depumping with no loss of shape, leading to a nice smooth spline. However, it is easy to go too far with this, i have made this mistake multiple times. Too many vertices can prevent the depumper from doing its job effectively, this leaves you with jolts and pumps within your radius comb. The image above shows the density i usually strive for during this stage of construction. From my testing it seems anywhere from around 2 - 5 m distance between vertices gives the best results.
The tighter the section of track you are working on will decide the density you should use, tight curves and corkscrews should use a higher density, whereas long sweeping drops can use a lower density. The scale of your coaster also plays a big role in this, a small compact ride will require a high density, whereas a huge, sprawling giga coaster will be fine at a lower density.
If you have to change the density within the element, make sure you do it gradually, going straight from a 2m spacing to a 5m spacing will result in a loss of shape when you depump, try to get a nice transition between your vertex densities throughout the element. More on the depump tool next.
The depumper and you, maintaining a happy relationship
The start and end points of your depumping zone are vital to the final smoothness of your draft element, if used incorrectly, you can end up creating more pumps than you eliminate, here is some advice in the best use of this vital tool.
TIP #1 Choose your selection area wisely.
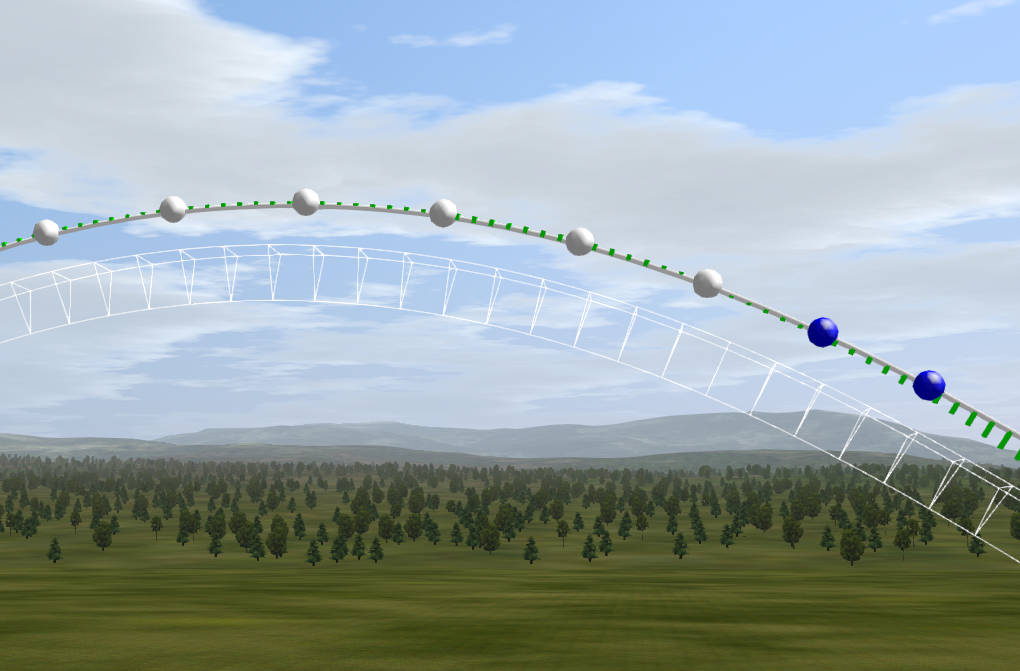
Starting or ending your selection on a section of track undergoing high forces or rapid direction change is a big no no. After depumping, the nodes at the end of the selection will move slightly, while the un selected nodes will not move to compensate, and create a large kink or pump within the track. By ending your selection on an area with no force or radius change, as shown in the above image, this problem does not occur.
TIP #2 Go big or go home
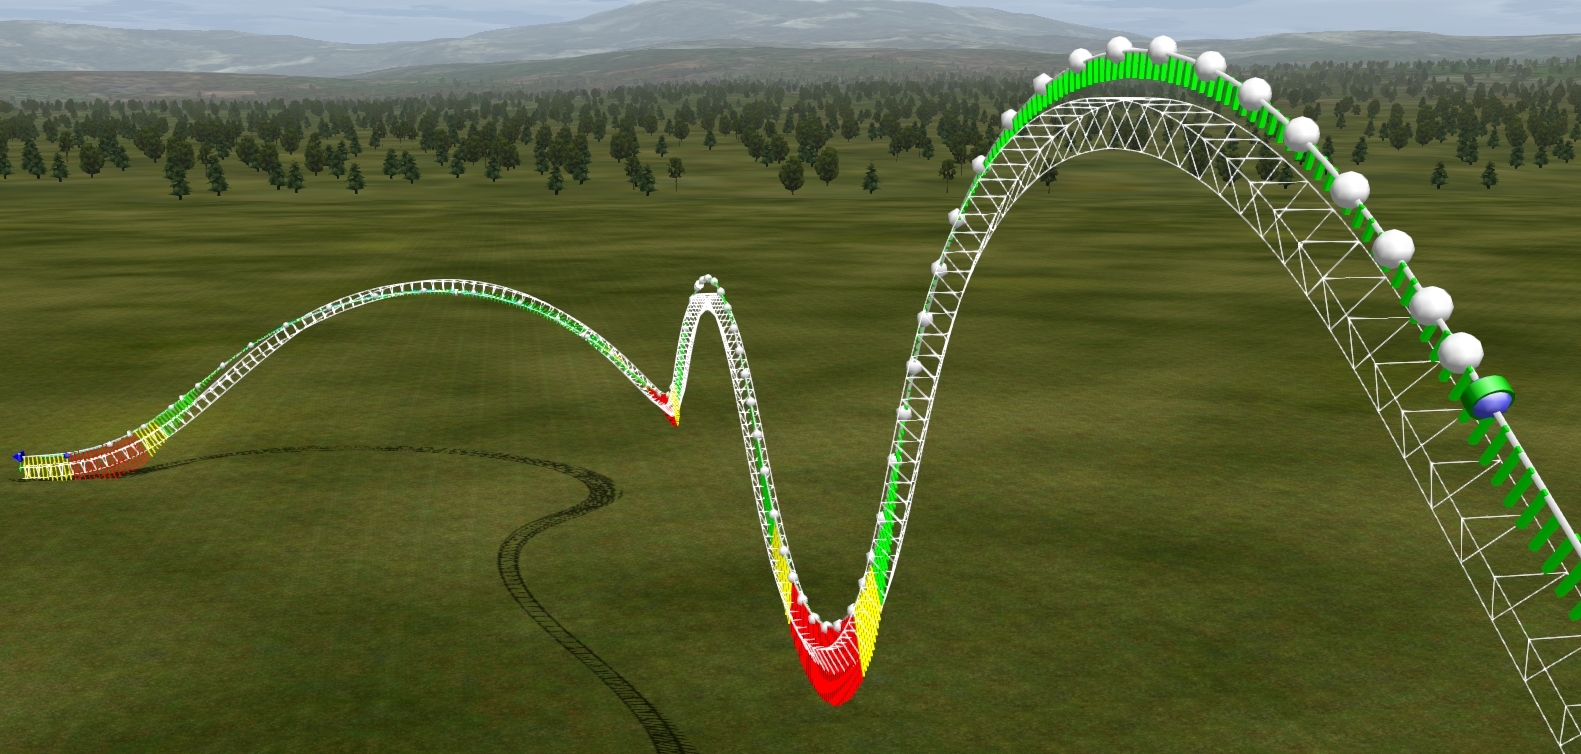
To achieve true smoothness, the only true start and end points for your depump should be flat sections with strict nodes, such as lifts and mid course brakes, when possible, i recommend depumping the whole damn thing if you have the patience, obviously this can pose an issue when your layout is 6000 feet long, but by doing so you will ensure than no pumps exist within the spline. I once spent over a day depumping a single coaster, obviously performance and time taken will vary depending on the number of vertices and the power of your computer.
TIP #3: End points
This one is simple, as shown above, when the track is not complete, leave some vertices ant the end un selected, as the depumper will try to straighten them out when you smooth it.
Conclusion
After around 40 mins of fiddling and inserting vertexes and depumping, here is the current state of our over-banked turn.

By this point you will have a solid first draft of your element, the spline should be decently smooth, and the roll should be flowing nicely, in the next episode i will cover the process of eliminating any excess lateral forces within your element, while leaving the roll rates untouched, i hope you enjoyed this instalment, definately delving into some more advanced techniques compared to the banking wobble elimination covered in episode one. Once again let me know if you have any questions on things covered in this episode or any hand-building issues at all that you may have encountered, im sure myself and the rest of the community will have some great advice to help you out.
Until next time, Goodbye and happy building!

As someone who does build coasters hand built, It's nice to see a thread on this. NLE had a topic on how to make coasters but it wasn't the best help. This is really quite helpful, even if I knew most of it already. Always helps to have a refresher every now and than.
Great help element, this is going to be really useful for newcomers.
Random quick tip #1
Struggling with flat turns or other constant radius elements?

Try Circle!!!, Its super effective!!!


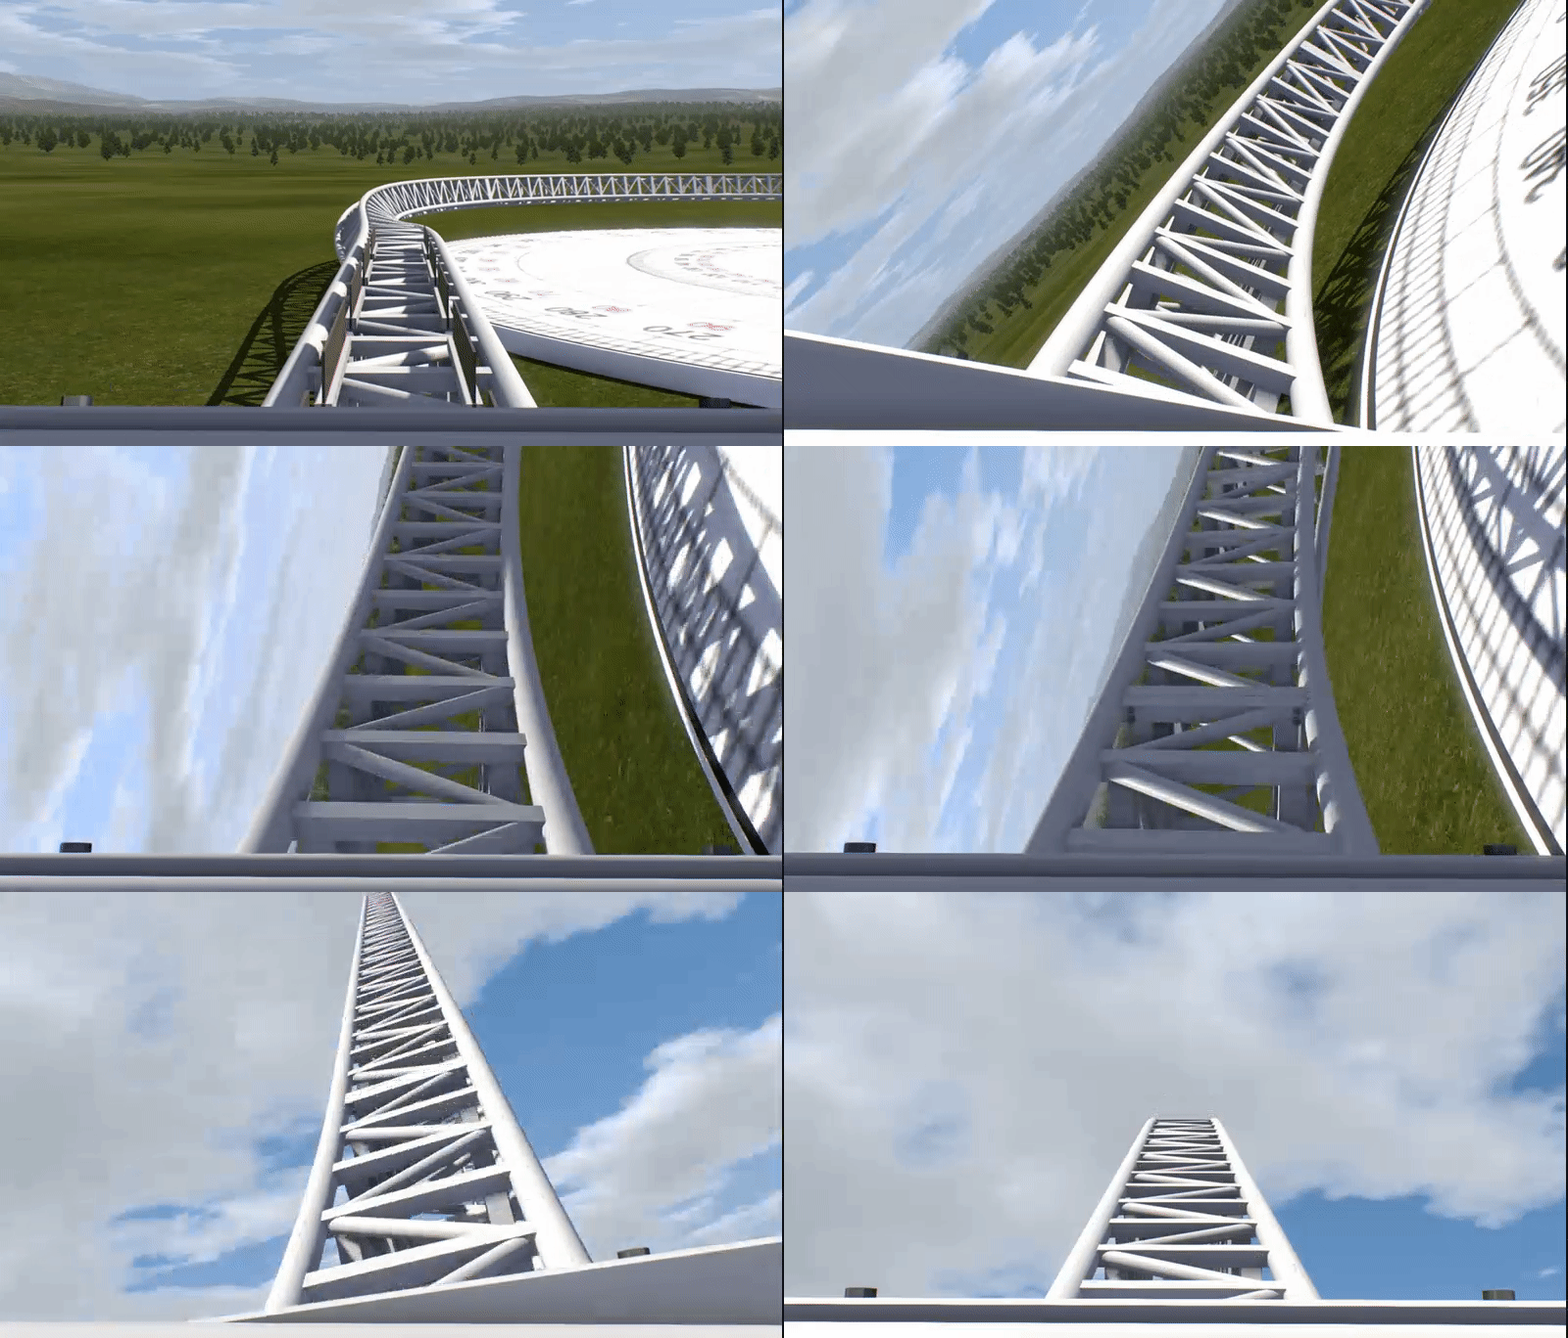
Order your circle today! From only £14.99 its an absolute steal, it can be used on any axis you want and will guarantee a nice, sexy constant radius! (or just make one in Sketchup)
Element 115's Hand-Building Bible
Episode three: Elimination of unwanted forces and achieving a final draft

This episodes topic will cover one of the final steps i go through to complete an element, by this point you should have a fairly smooth flowing track. We are now going to go over the process of toning down or removing any excess forces that your element may be exerting, once again we will use our over-banked turn, it is in the same state left by the previous episode.
Identifying the forces you wish to reduce or remove

Here we see the exit of our turn, by looking at the comb you can see some small lateral forces acting in both directions. Under normal circumstances these forces are very minor and not too much of a big deal, this process is more useful when your forces are too high and must be reduced. However for the sake of this tutorial i will attempt to reduce the laterals to near zero (within the editor, simulator forces will vary depending on the seat you ride your coaster in) So, let us begin.
Method one: Manual vertex movement
This method is best suited to lateral forces acting at 90 degrees of banking, such as the entry or exit of a heart-line roll. Please note that both of these methods will alter the height and direction of your track spline. For accurate recreations or building within a specific space for contests, you will instead have to edit the roll, or use a combination of both in order to keep within boundaries or keep a specific shape.
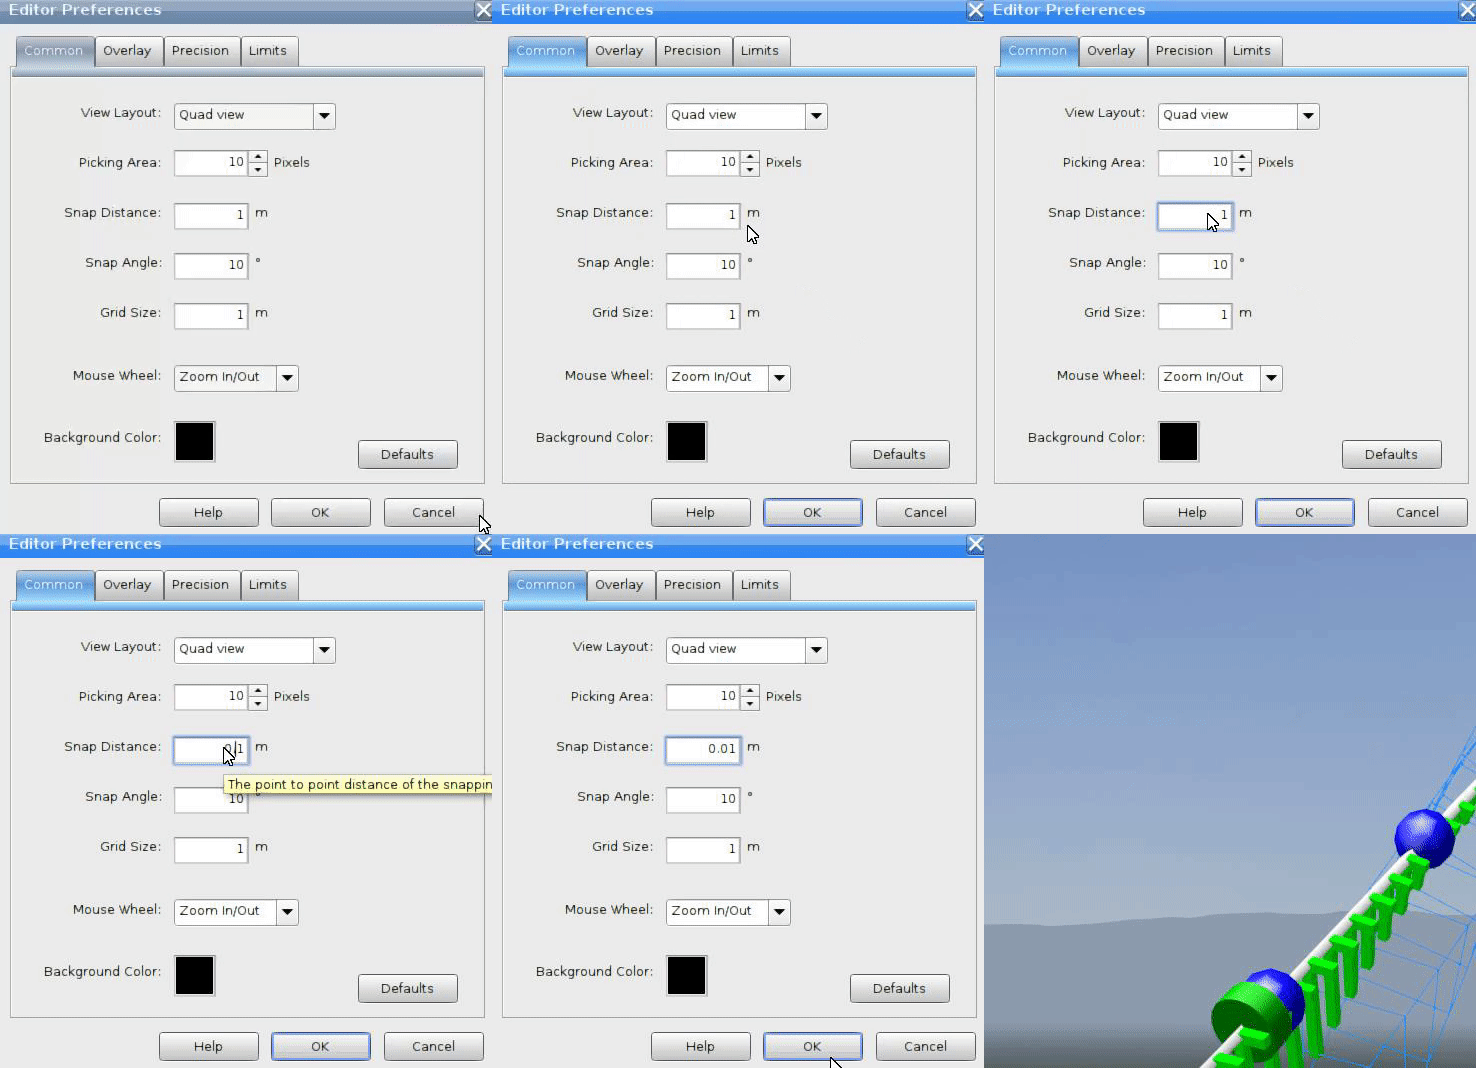
First off, ensure your snap value is set to a very low amount for greater accuracy, i usually use a value of 0.01m or lower.
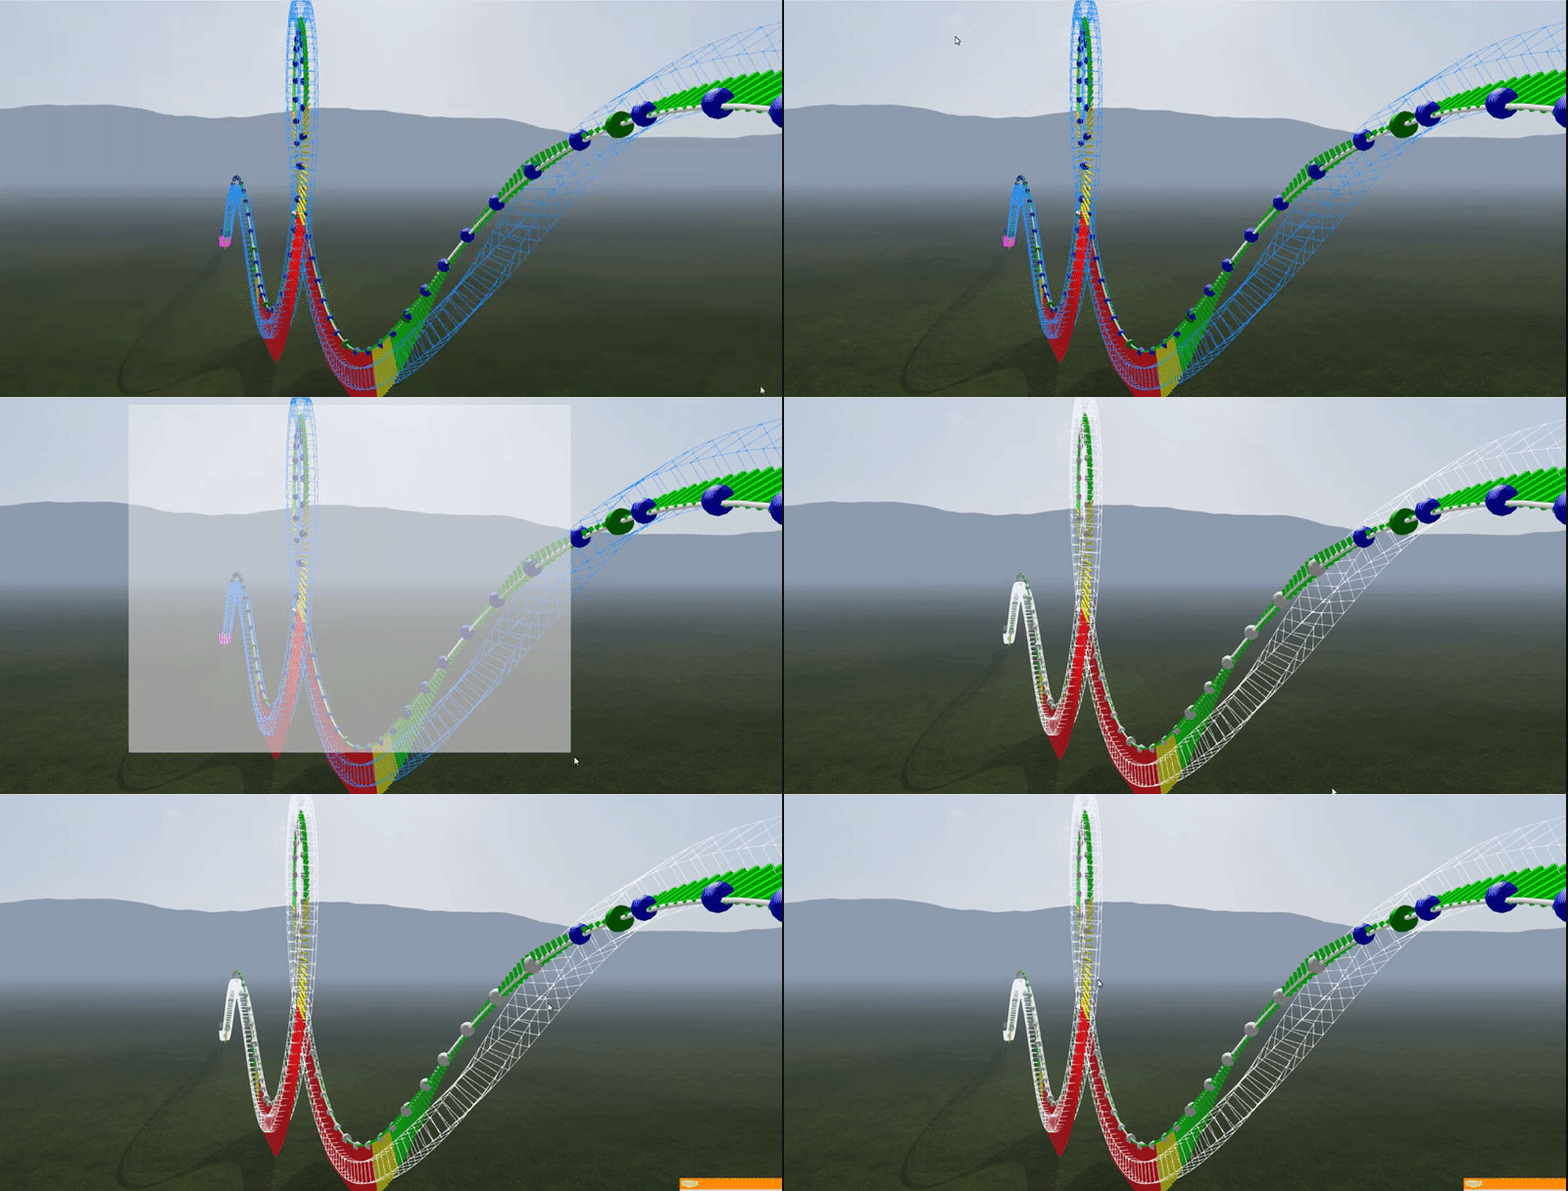
Now select all the vertices up until your unwanted forces start appearing.

Using the page up or page down keys, move the series of vertices until the forces are reduced, this movement can also be done using the arrow keys for laterals on a horizontal direction during flat turn transitions, but i prefer to use method two for that.
deselect one vertex at a time and repeat until all of the force has been reduced to your required level. Once done be sure to depump the whole element again a few times, if the depumping causes the forces to return, repeat the process more times until satisfied.
Method two: Rotational vertex movement
The Method starts of the same as method one, however no snap value is needed ans snap should be disabled entirely.
First off, display two views on your screen, one as a top down view with no visual combs enabled, the other as perspective view with the force comb enabled. After selecting the series of vertices as in method one, rotate each vertex from the top view until the forces have been removed, then deselect and repeat with the next vertex. The method is shown below:

You can use this method for forces acting vertically too, just select a side view instead of top down. Its all a matter of user preference on what method to use (if any at all). I personally use both equally depending on the situation.
As with method one, depump multiple times and repeat until you are happy with the forces.
Arriving at the final draft

Here is our over-banked turn, as you can see, the lateral forces have been completely removed to a negligible amount within the editor, afther depumping and fiddling around a few more times, i arrived at the final draft of the element:
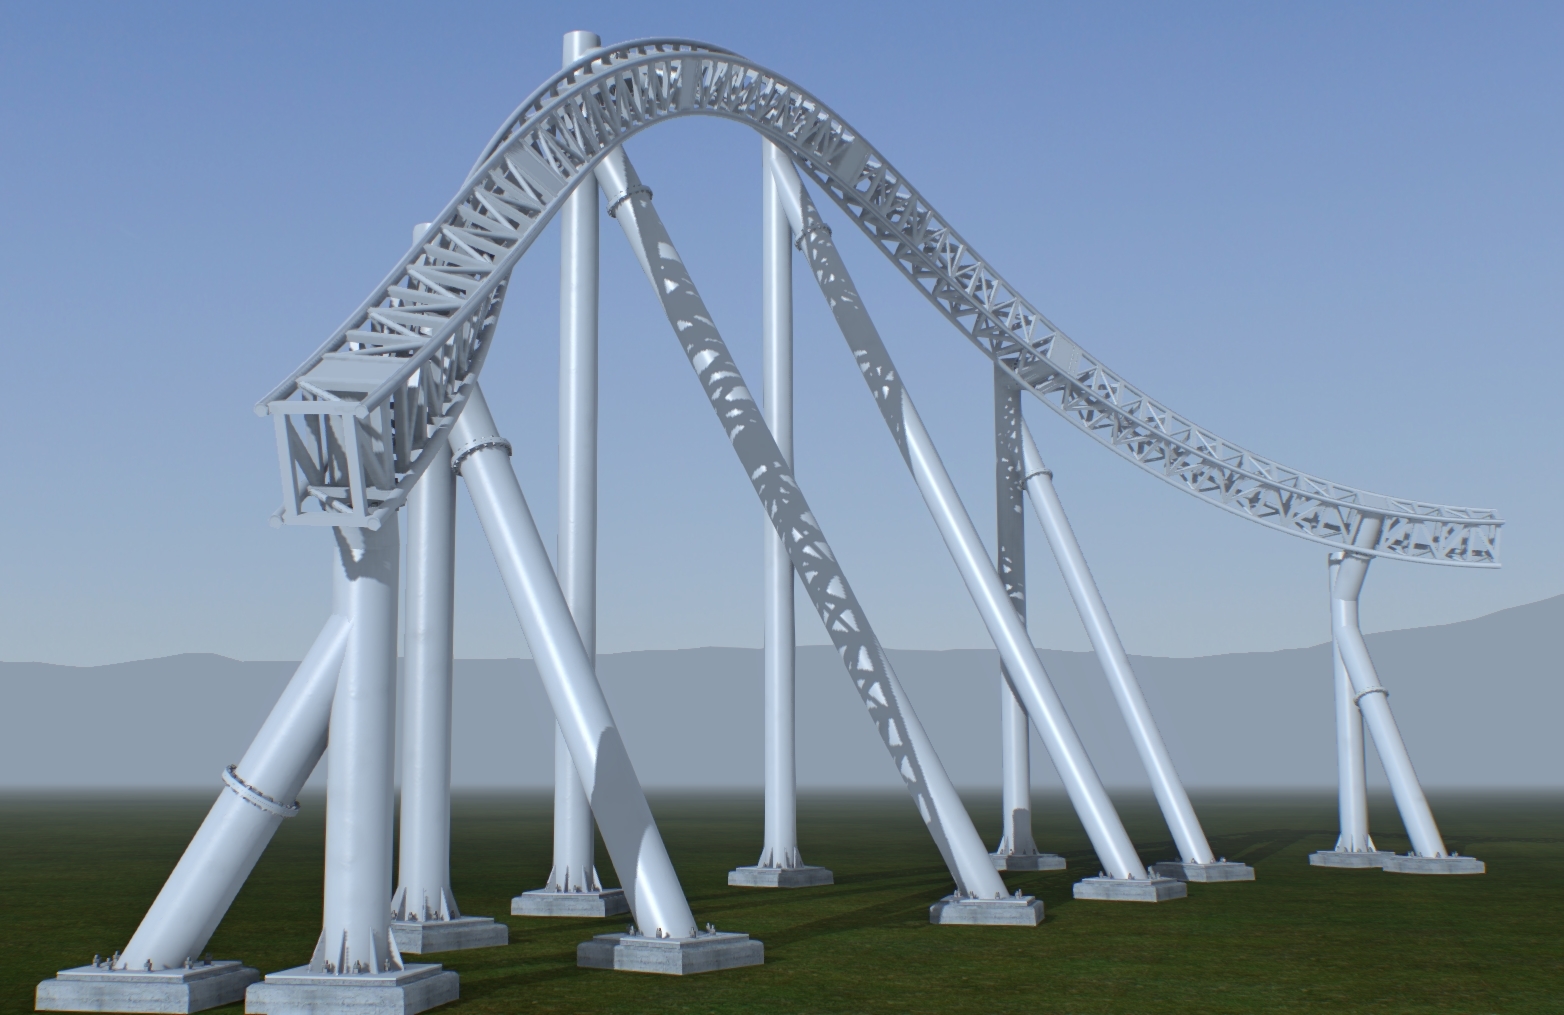

Now, by this point most people should be very happy with the element and move on to whatever is next within their layout, i am aware that this is a very strange way of building a track, but i hope some people have learned about some of the quirks of hand-building throughout this series. The next main episode will focus on a final smoothing method i use once a whole section of your layout has been completed, however it is only really needed if you are incredibly OCD about your radius combs and will make little difference to the ride experience within the simulation.
Until next time, Goodbye and happy building!

This is some great stuff, I'll certainly be trying a few of these techniques to refine some of my works in progress :)
This is awesome work, Element. Thank you for sharing in such a concise, easy to follow way. I look forward to future installments.
Good explanation! It's fun to see that there are other users that build their coasters exactly the way I do!

This is the only way I like to build, so I appreciate episode1. I don't like the idea of 'cheating' or taking short cuts with 3rd party programs, but I do understand the high levels of precision you can have with them. Though I have a whole park called "Gangstas' Adventures" that consist of 11 coasters and 11 (or 12) flat rides that I'll be releasing some time in 2018, I have not applied any tips from episode 1 on any of the 11 coasters. Those tips are a little better than the tutorial I saw a few months back, so this will come in handy for my next park.
Element 115's Hand-Building Bible
Episode four: The never-ending quest for perfection
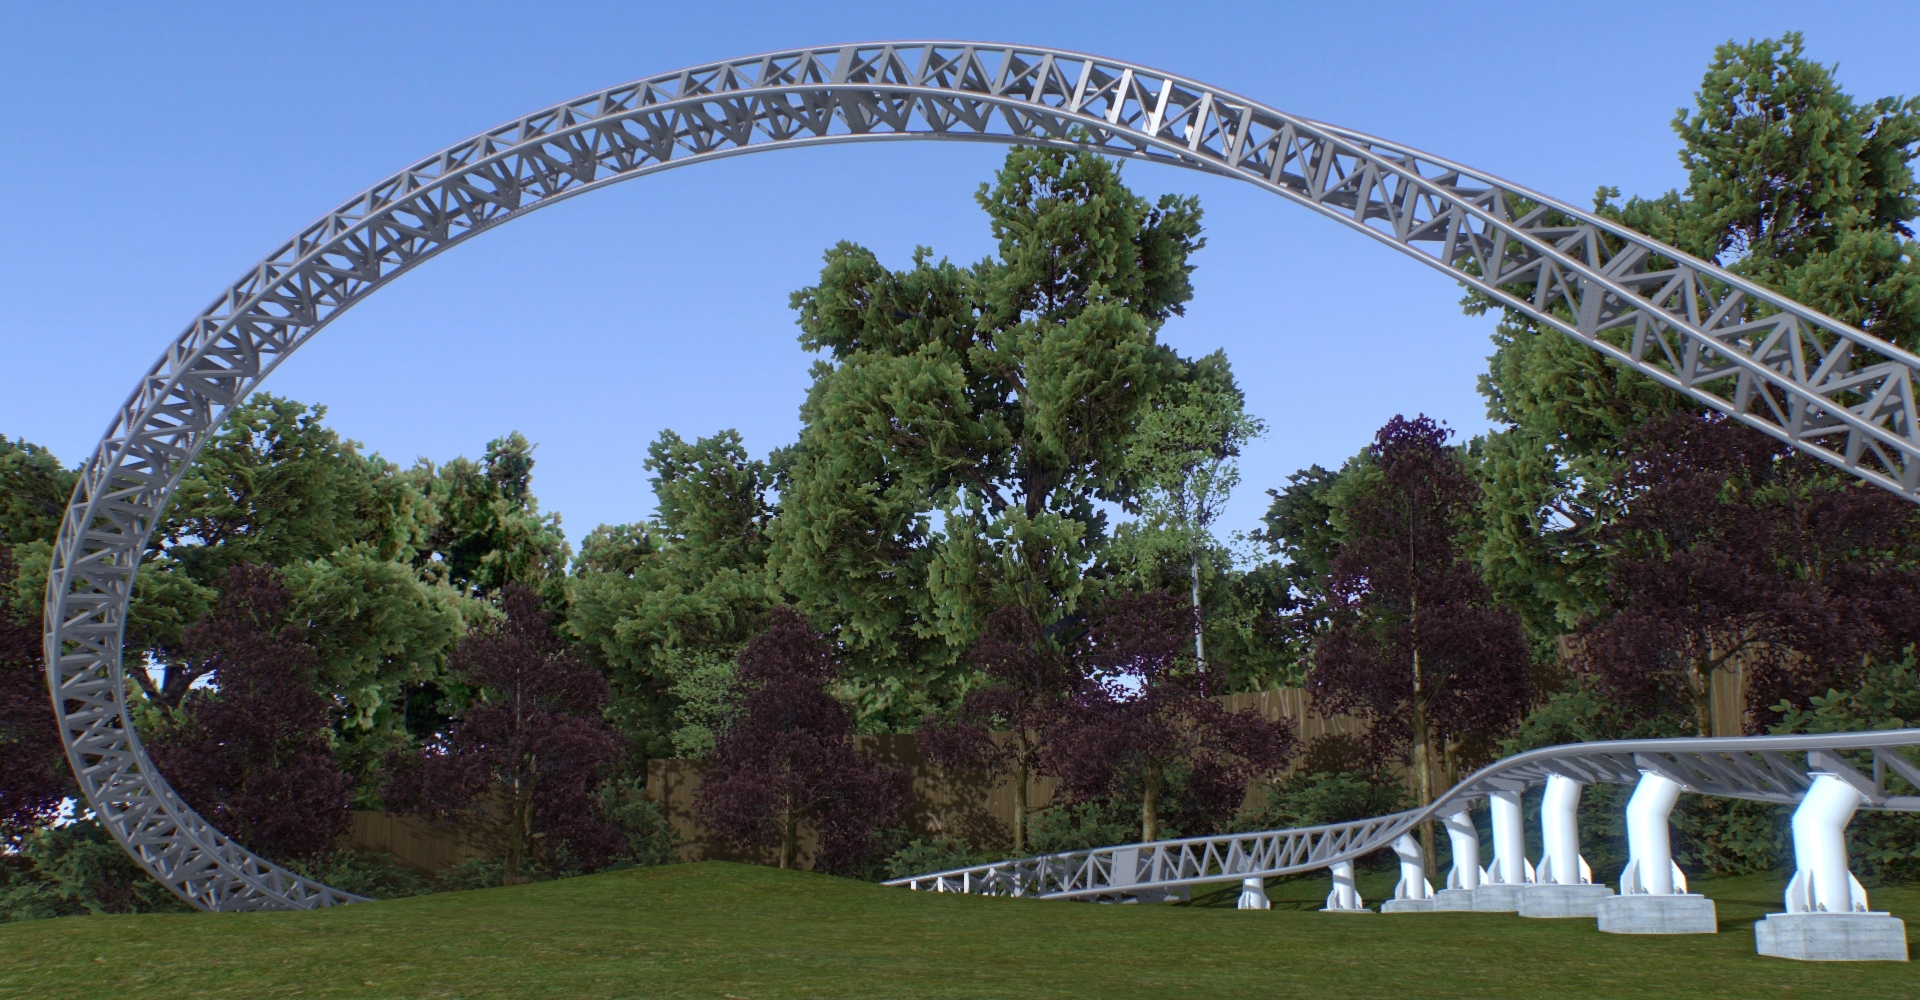
In this episode i will cover a process of smoothing that uses the spline export feature included within the professional version of No Limits 2, before we begin, a quick disclaimer.
This method will involve the complete removal of all your roll nodes, meaning that you will have to re add all of the banking to your coaster after the smoothing process is complete. In order for it to be successful, you need a well shaped and built coaster with a high vertex density, this will not turn a spaghetti noodle of wobbly strict banking into a perfect smooth spline with nice shaping. I strongly recommend to follow along with all the previous episodes to make your layout before proceeding with this method. This process may result in minor changes to your original shaping and is therefore advised only for custom coasters that follow no specific manufacturer.
Spline smoothing is recommended for the following people:
Those with a high amount of patience (you will see why later).
Perfectionists who strive for the smoothest radius comb possible.
People that get constantly annoyed by minor pumps in their track that are barley noticeable at all in ride view.
People recently released from an asylum who worship the radius comb with kitchen utensils and have built an altar.
Spline smoothing requirements:
A well built coaster with a decent vertex density that has been made as smooth as possible.
A complete section of track that you are 100% happy with.
Some form of straight section with strict nodes at each end (Lift, MCBR, FBR, Station etc).
A professional license of No Limits 2.
A backup file of your coaster in case something goes tragically wrong with the shaping or you don't like the result.
Preparation of your track section


To begin, we must remove everything except the section of track that we will be smoothing. As you can see above i have extended our demonstration coaster into a full layout up until the final brake run, For this episode, i will be carrying out spline smoothing on the section of track from the crest of the first drop, up until the brake run. The flat turn from the launch to the slope has already been smoothed using this method.

I have now removed everything i will not need to smooth, be sure to leave the flat section at the end of your track in order for a smooth transition to be made, be sure to not reach your undo limit during this process as we will need to use ctrl z to bring back the deleted track sections.
Exporting the spline

Go to the professional tab within the editor and select "Export track spline". Use the above settings in the export window. Once done, click ok and save the file to a known location on your pc (ideally the park file of your coaster), the program may freeze for a few seconds depending on the size of your track section.
Once this has been completed use ctrl z to bring back the coaster in its entirety. Now you need to delete the entire section of track you previously exported, In my case, i was left with just the flat turn and slope, as shown below. do not move or rotate your coaster during this process.

Re-importing the spline

Once again, open the professional tab and click on "Import track spline" use the same import settings within the import window as i have shown above.

Once the spline has been re-imported, connect your imported section back onto your existing track, ensure that the first node is still set to strict, and make sure that gap between the strict node and first regular vertex is small, as this will ensure the smoothest radius transition from the flat section. Delete any vertices that are within or intersecting with the strict node (not shown above).

On your end flat section, set an appropriate vertex to strict, ensuring it is within the flat portion of track, then slide it close to the regular vertex before it. Try to leave a similar small gap as done at the start of the section. You can then remove any vertices between the end point of the straight section and your strict node. This concludes the import process.
The smoothing process

You must now hide the vertices of your track using the view panel and delete all of the roll points between the two flat sections of track, the imported roll is often imperfect and choppy, therefore your banking must be added later on in the process.
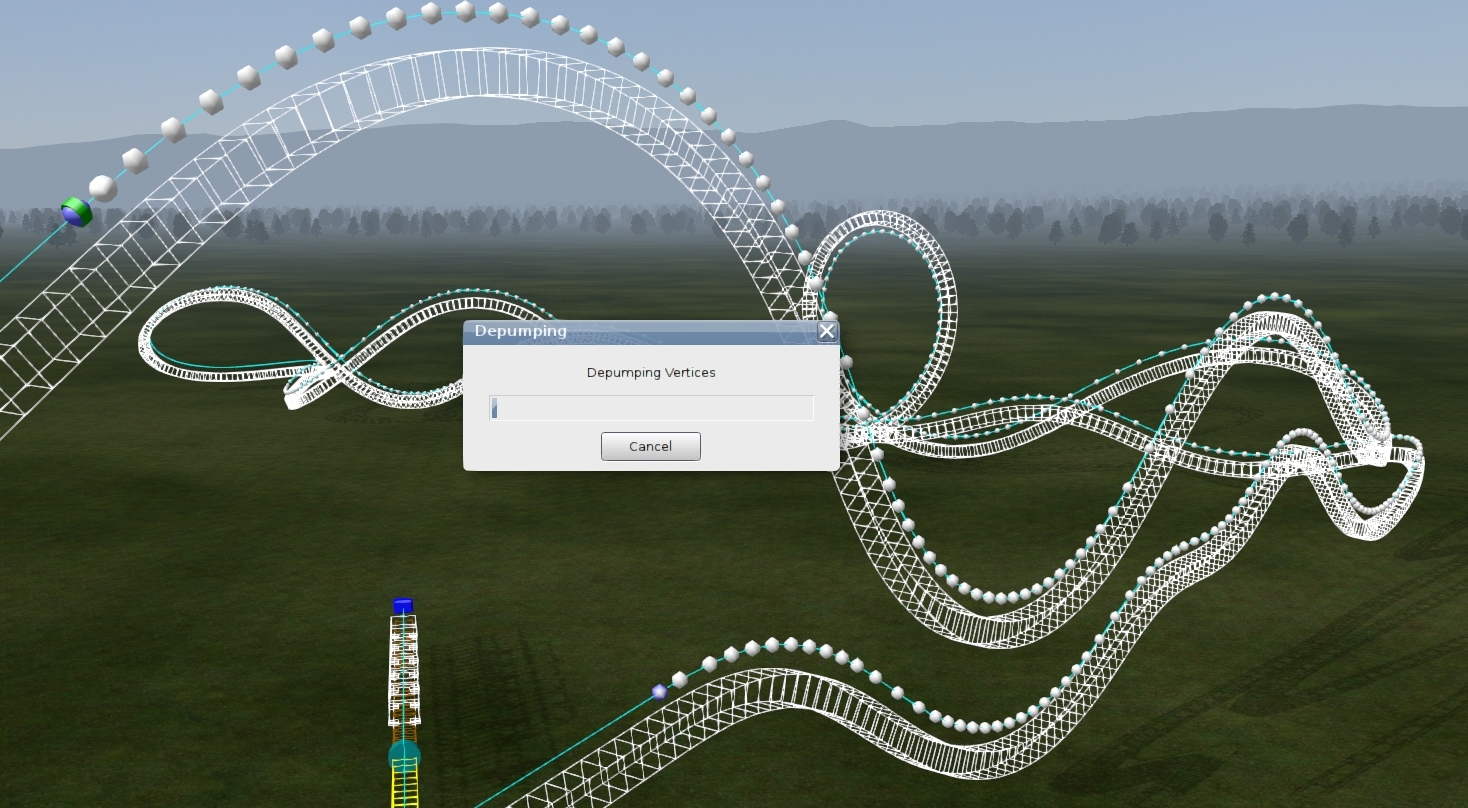
Select all of the vertices in your track section EXCEPT THE TWO STRICT NODES. Once selected, depump the entire section of track... yes that's right, the whole thing. I am deeply sorry if you have created a giga coaster at this point, you may want to go outside or watch a movie as this will take a VERY LONG TIME. once the whole section is depumped, you must then depump again AT LEAST TWO MORE TIMES. Once again, find something to do during this time, if your coaster is a recreation of Fury 325 or Steel Dragon 2000 i would suggest booking a holiday for each depumping session, it will pass the time quicker.


You can now survey your smoothed spline with joy and bask in the glory of the stunning smooth curves before your eyes. However its not over yet, the track is now un-banked remember. This is where your backup file is useful, re add in your roll nodes and match the original shaping as closely as possible, ensure the roll is smooth with no wobble and try to use as few roll points as possible. Once you are happy with the banking, depump the whole thing one FINAL time and relax. Once that depump is concluded you are done. now you can move on to the next section of track and start all over again!!!!!
Be sure to freeze your coaster and enjoy the fact that underneath the frozen shell, lies a radius comb to compete with an FVD coaster, only yours, was entirely hand built!


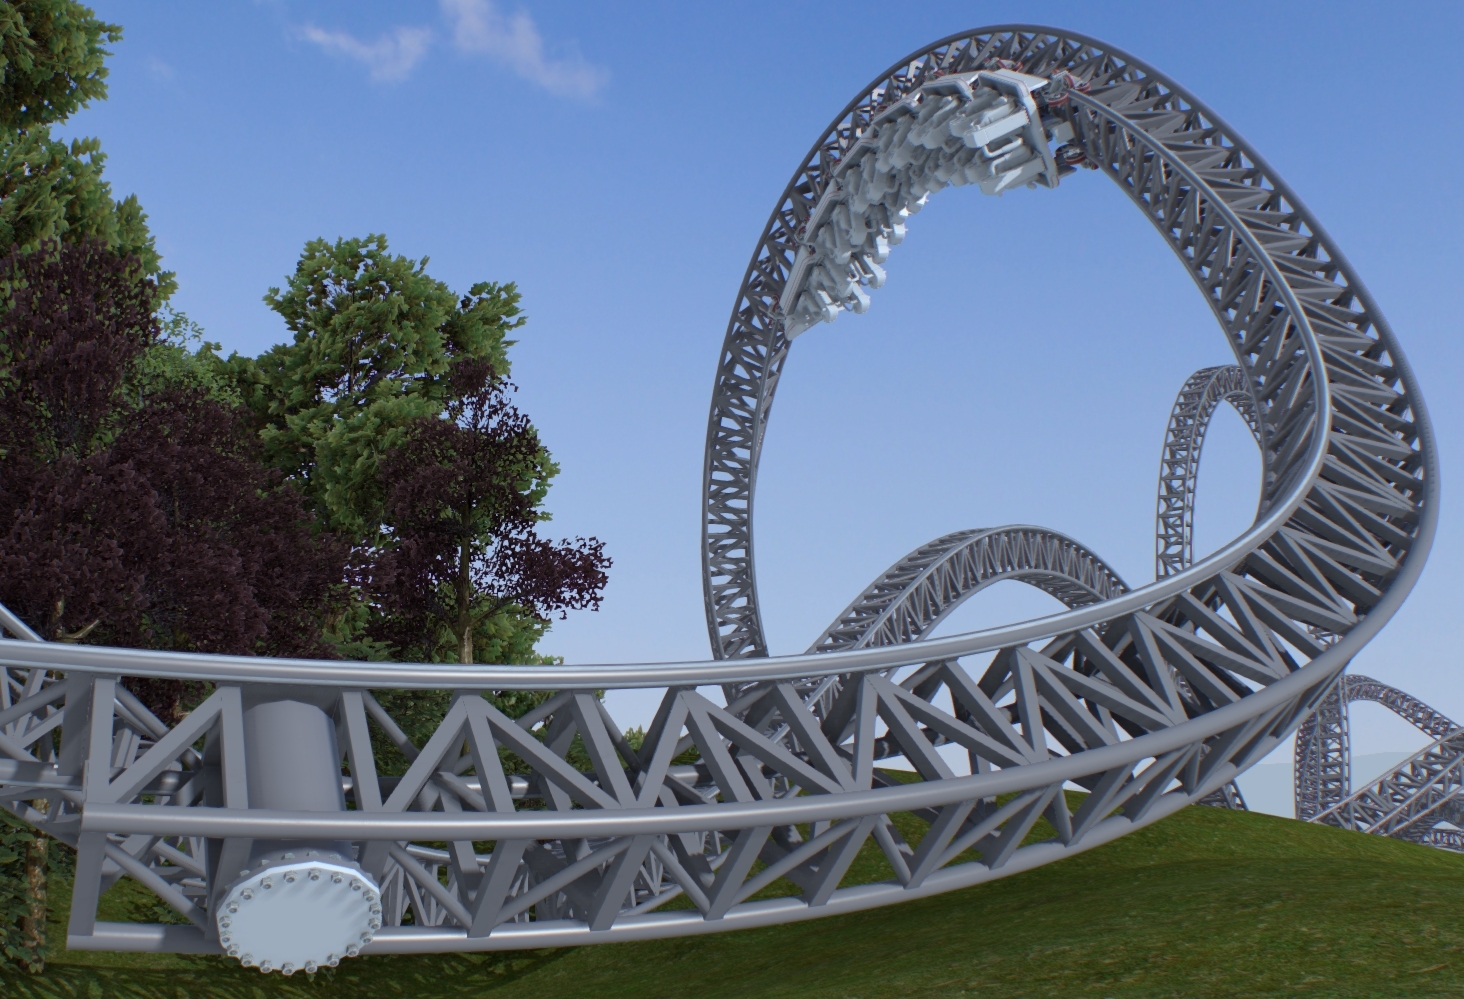
Until next time, goodbye and happy building!

And with that, I now know an even more fiddly, even smoother hand building finishing technique. Awesome stuff E115!

Hand-building is also my strongly preferred building technique.
Can we get the coaster you built here?
You may see it in the future, i do have plans for it, ill upload a pov soon for those that are interested.
How long did it take to depump that?
the whole process took about 1.5 hours, from initial export to fully smooth, but that was a fairly short layout


Holy crap that's a throwback and a half!

Please pin this - this is invaluable information!!
i know this much since i came across this 8 months ago my tracks have been getting better and better. thanks for this for real. i am now building almost everything by hand, the loops i still cant get just yet but every other element im doing now.
If your on about vertical loops, just use the premade loop element and adjust it to your needs, its way faster.
Can you do a handbuilding guide for jet coasters and other Japanese coasters like Togo?
I think you are far more qualified to make that than me ;)
Welcome to your destination for handbuilding techniques and advice
In this thread i will cover all of the techniques i use to hand-build a coaster layout within No limits 2 from scratch, please note that the methods i showcase are heavily influenced by the style of coasters i usually build, these being not related to any specific manufacturer. Some of the ways i shape will alter the path of the track, spline smoothing especially will change the roll and shaping. Therefore when creating a ride to emulate the style of a manufacturer such as b&m i would recommend not using it as it may undo all of the effort you put it to making the shape accurate to their style, same goes for recreations. If you are making your own style of custom coaster, i highly recommend you try out some of the methods i post within the following millennia.
Some of the posts will focus on common problems encountered by beginners while others will delve into more advanced methods used to create perfect smooth splines and constant radius turns.
Please note that the techniques that i show are just one way to do things, do not consider them the ONLY way to do it, or the RIGHT way to do it, they are simply how i have learned to do things over my time within No Limits, some people will disagree with them and have their own way of doing it and that's fine, infact its what makes communities like this thrive, if there was only one way of doing things, it would get boring very fast!
Anyway, rambling aside i hope i can help some people learn some new things over the course of the following posts, feel free to ask any questions regarding specific problems you encounter, as every situation can be different and require different techniques to solve.